Forum Replies Created
-
AuthorPosts
-
April 11, 2015 at 10:28 am #12541
 vhgmcbuddyMember
Hi Rob
Thanks for info. I used to use an old horse trailer, but when the horse went, so did the trailer, and now I am one of those guys with planks and a small unsuitable trailer, which is OK for mob paving the Wheel Horse locally, but the MG2 is a different issue, or writhed of them on the main road (I live in rural area).
Small plant trailer seems like best option.
Has anyone put a Ransomes MG into a small box van, my Dad has a Citreno Despatch with metal ramps that he uses to transport his snmall golf buggy. Payload is over 1tonne I think, so should fit and cope with load.
Thanks….see post on starting MG2….. Yes she is running! (Oil pump looks lazy however)
Graeme
April 11, 2015 at 9:34 am #12540vhgmcbuddyMemberWell, good to hear you have found a way to get your WH back to work Owen. I see you got those parts separated to get the lift shaft off the tractor. Yes I have found the same thing with machine shops not wanting to do one off jobs or small jobs without big money. Please keep us posted Owen. Glenn
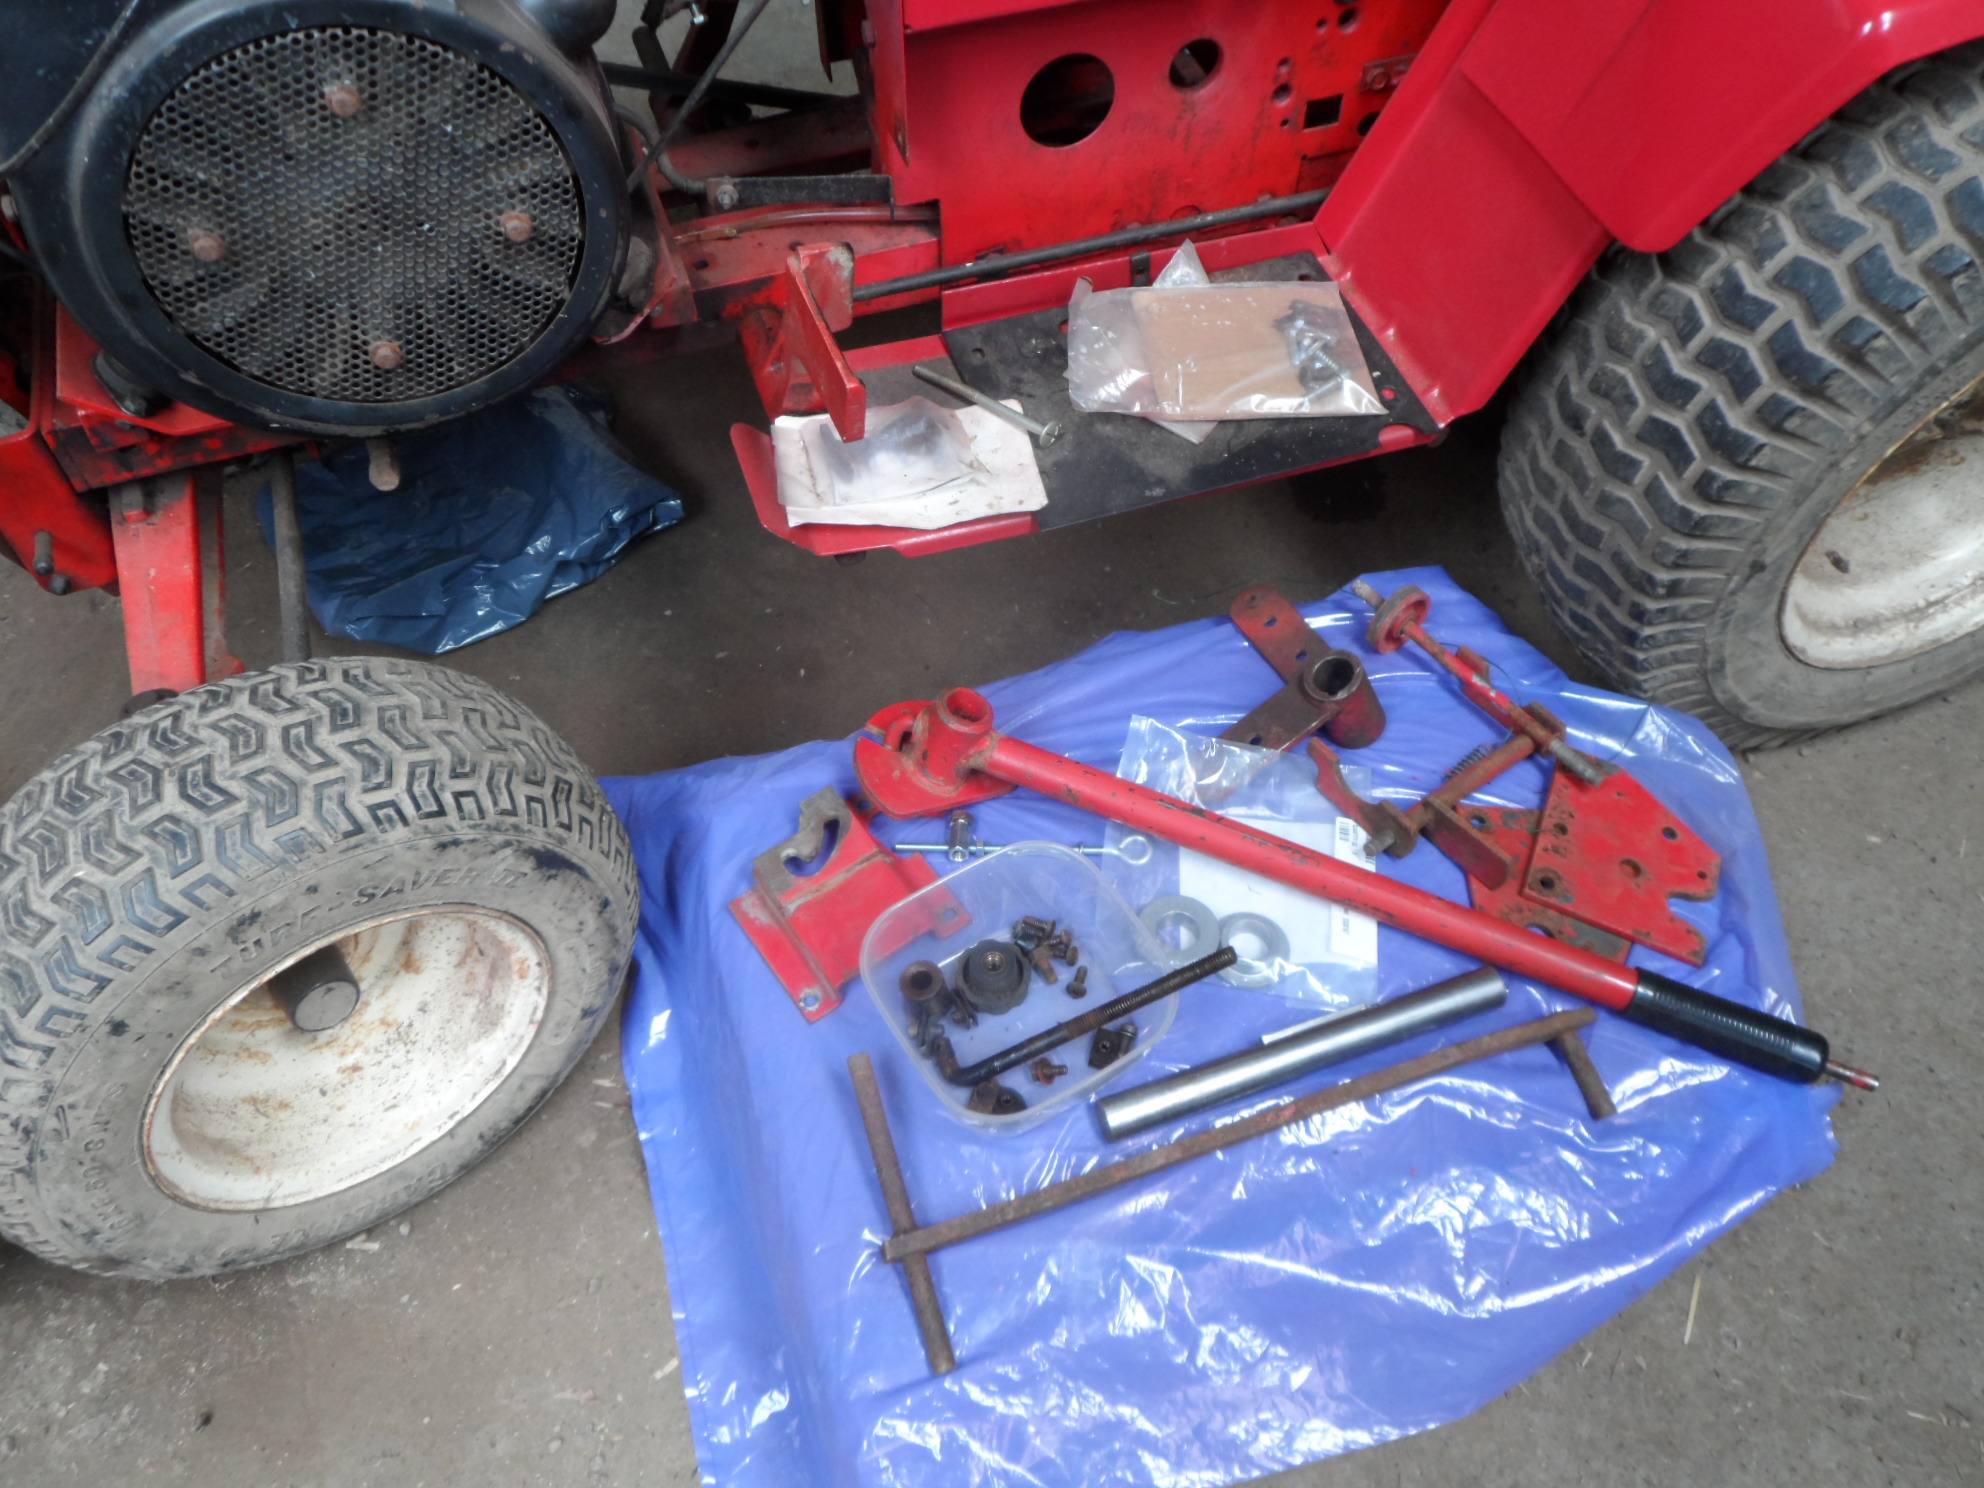
April 11, 2015 at 5:43 am #12528vhgmcbuddyMemberLatest on the lift shaft, I enquired at a few engineering shops regarding making the part. Mention it’s just a one off job, and I got we have a standard charge for smaller jobs, bring it along and we might be able to help, hope you are not in a hurry as these jobs get put on the bottom of the list, might as well have said they didn’t want the job. So I managed to find a length of 1″ diameter steel rod, cut it to length and a friend’s got a milling machine and kindly cut a key way, a few holes need drilling in it I can do myself. A few bits I ordered from Toro mainly bush bearings that the shaft runs in arrived yesterday, so after tidying and painting few bits it will be ready to fit it on.
Attachments:
April 9, 2015 at 7:25 am #12503vhgmcbuddyMemberI have learnt a bit more. When I look in the spark plug hole I see a remarkable amount of black crud. The correct plug for this engine is a Lodge CN, surprisingly still available. I now know this is a hot plug with 1/2 inch reach. The fitted plugs have been 3/8″ reach and, I suspect, cooler. At the very least this explains the ridge of crud round the bottom of the spark plug hole. I feel a little closer to a better tick over.
April 7, 2015 at 10:50 pm #12481vhgmcbuddyMemberInspirational, great job
GraemeApril 7, 2015 at 10:04 pm #12480vhgmcbuddyMemberThanks both
April 7, 2015 at 9:47 pm #12479vhgmcbuddyMemberStuart
I will keep that in mind if I cant find a flo jet carburettor.April 7, 2015 at 6:29 pm #12471vhgmcbuddyMemberIhe engine has started again after 2 days of starting troubles. learnt a couple of things; easy to get the contraption stuck with its nose down. In that position repeated failed attempt to start causes the oil filled air filter to become more a petrol filled air filter. Eventually came to the conclusion that I could not start in that position so I removed the plough and leveled the Trusty. After much churning got it started – refitted plough. engine ran roughly for ten minues and stopped. throughout all this i checked i had a spark – yes. Time for G&T. Next day sat and looked and thought. After doing nothing I tested spark – no spark. Left it. Next day – no spark. I have been twiddling engines for the past 58 years. I know all about “change the plug” and, of course, I have done that whenever I explored starting problems. But in all that time I have never ever found that the cure and came to regard it as a most unlikely “too easy cure”. Today I changed plug and it started easily. A tale of delightful hubris.
I am now concentrating on getting it to tick over without activating the centrifugal clutch. I checked the springs, they seemed good, rusty and strong. I feel sure I need to slow the engine.
I am now looking out for an attachment to flatten the increasingly lumpy field.
What fun
April 6, 2015 at 9:44 pm #12463vhgmcbuddyMemberI think I’m needing the bottom end as the thread is buggered. Only problem is getting a bottom end(no funny comments lol) had a quick look thru ebay but couldn’t see any. Do any you guys have any idea where I might get one, it would be much appreciated.
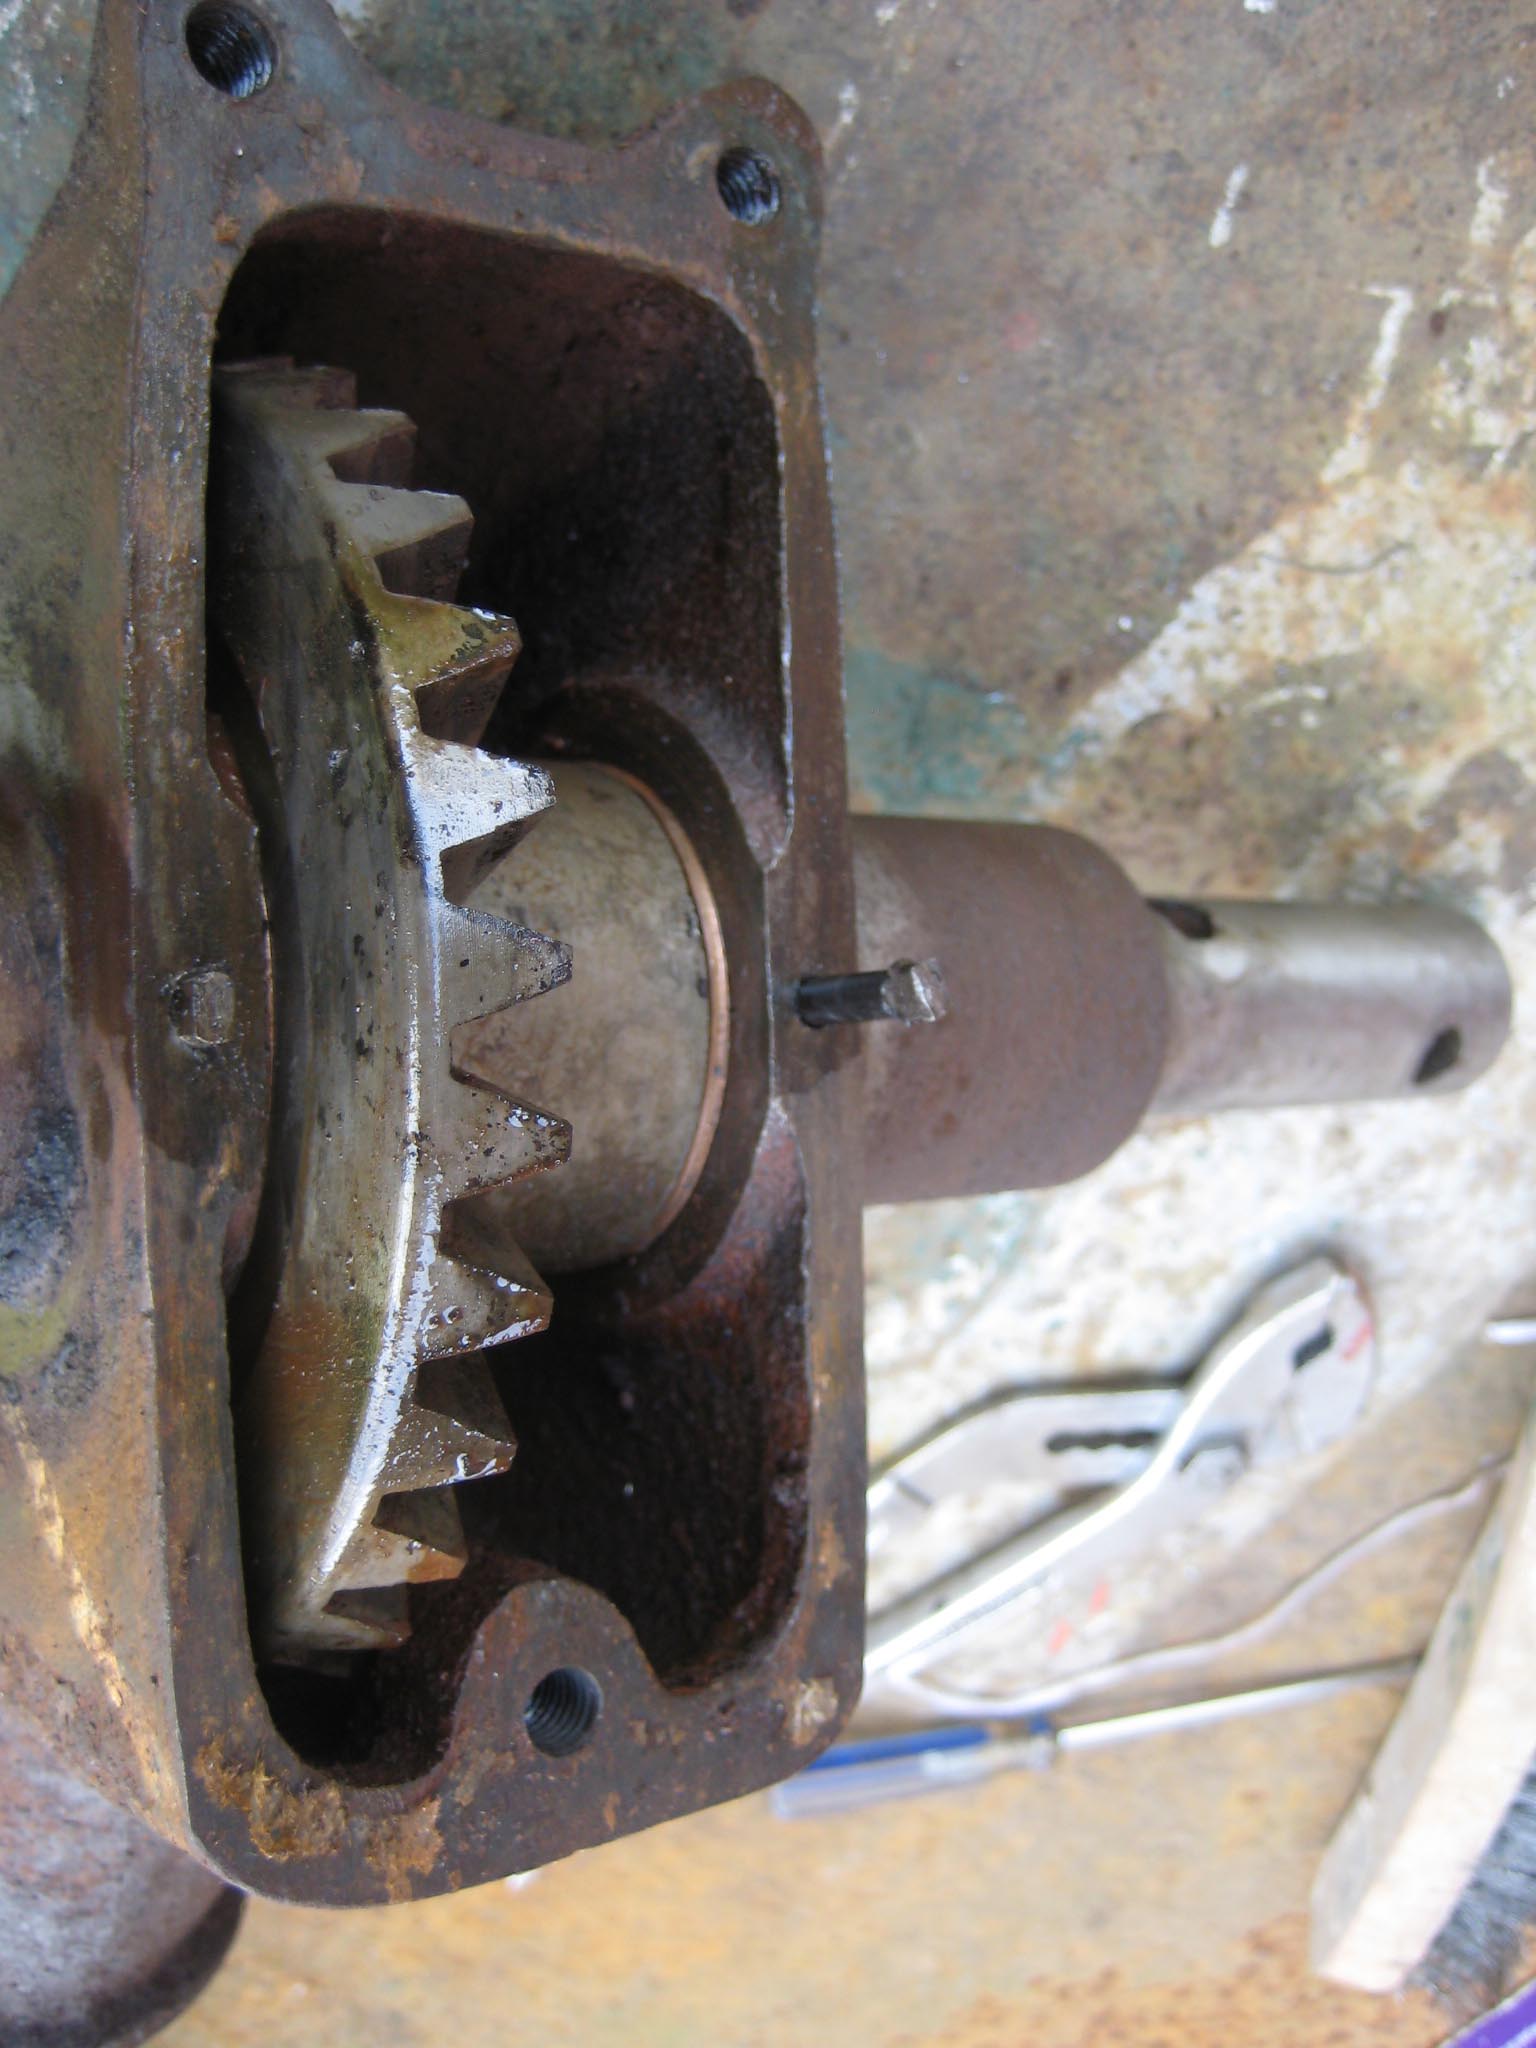
April 6, 2015 at 5:17 pm #12448vhgmcbuddyMemberAfter much head scratching, I finally took the plunge and dismantled the miller drive. There was some trial and error involved, which did result in some damage, so thought I would share how I did it, so you can avoid the mistake I made.
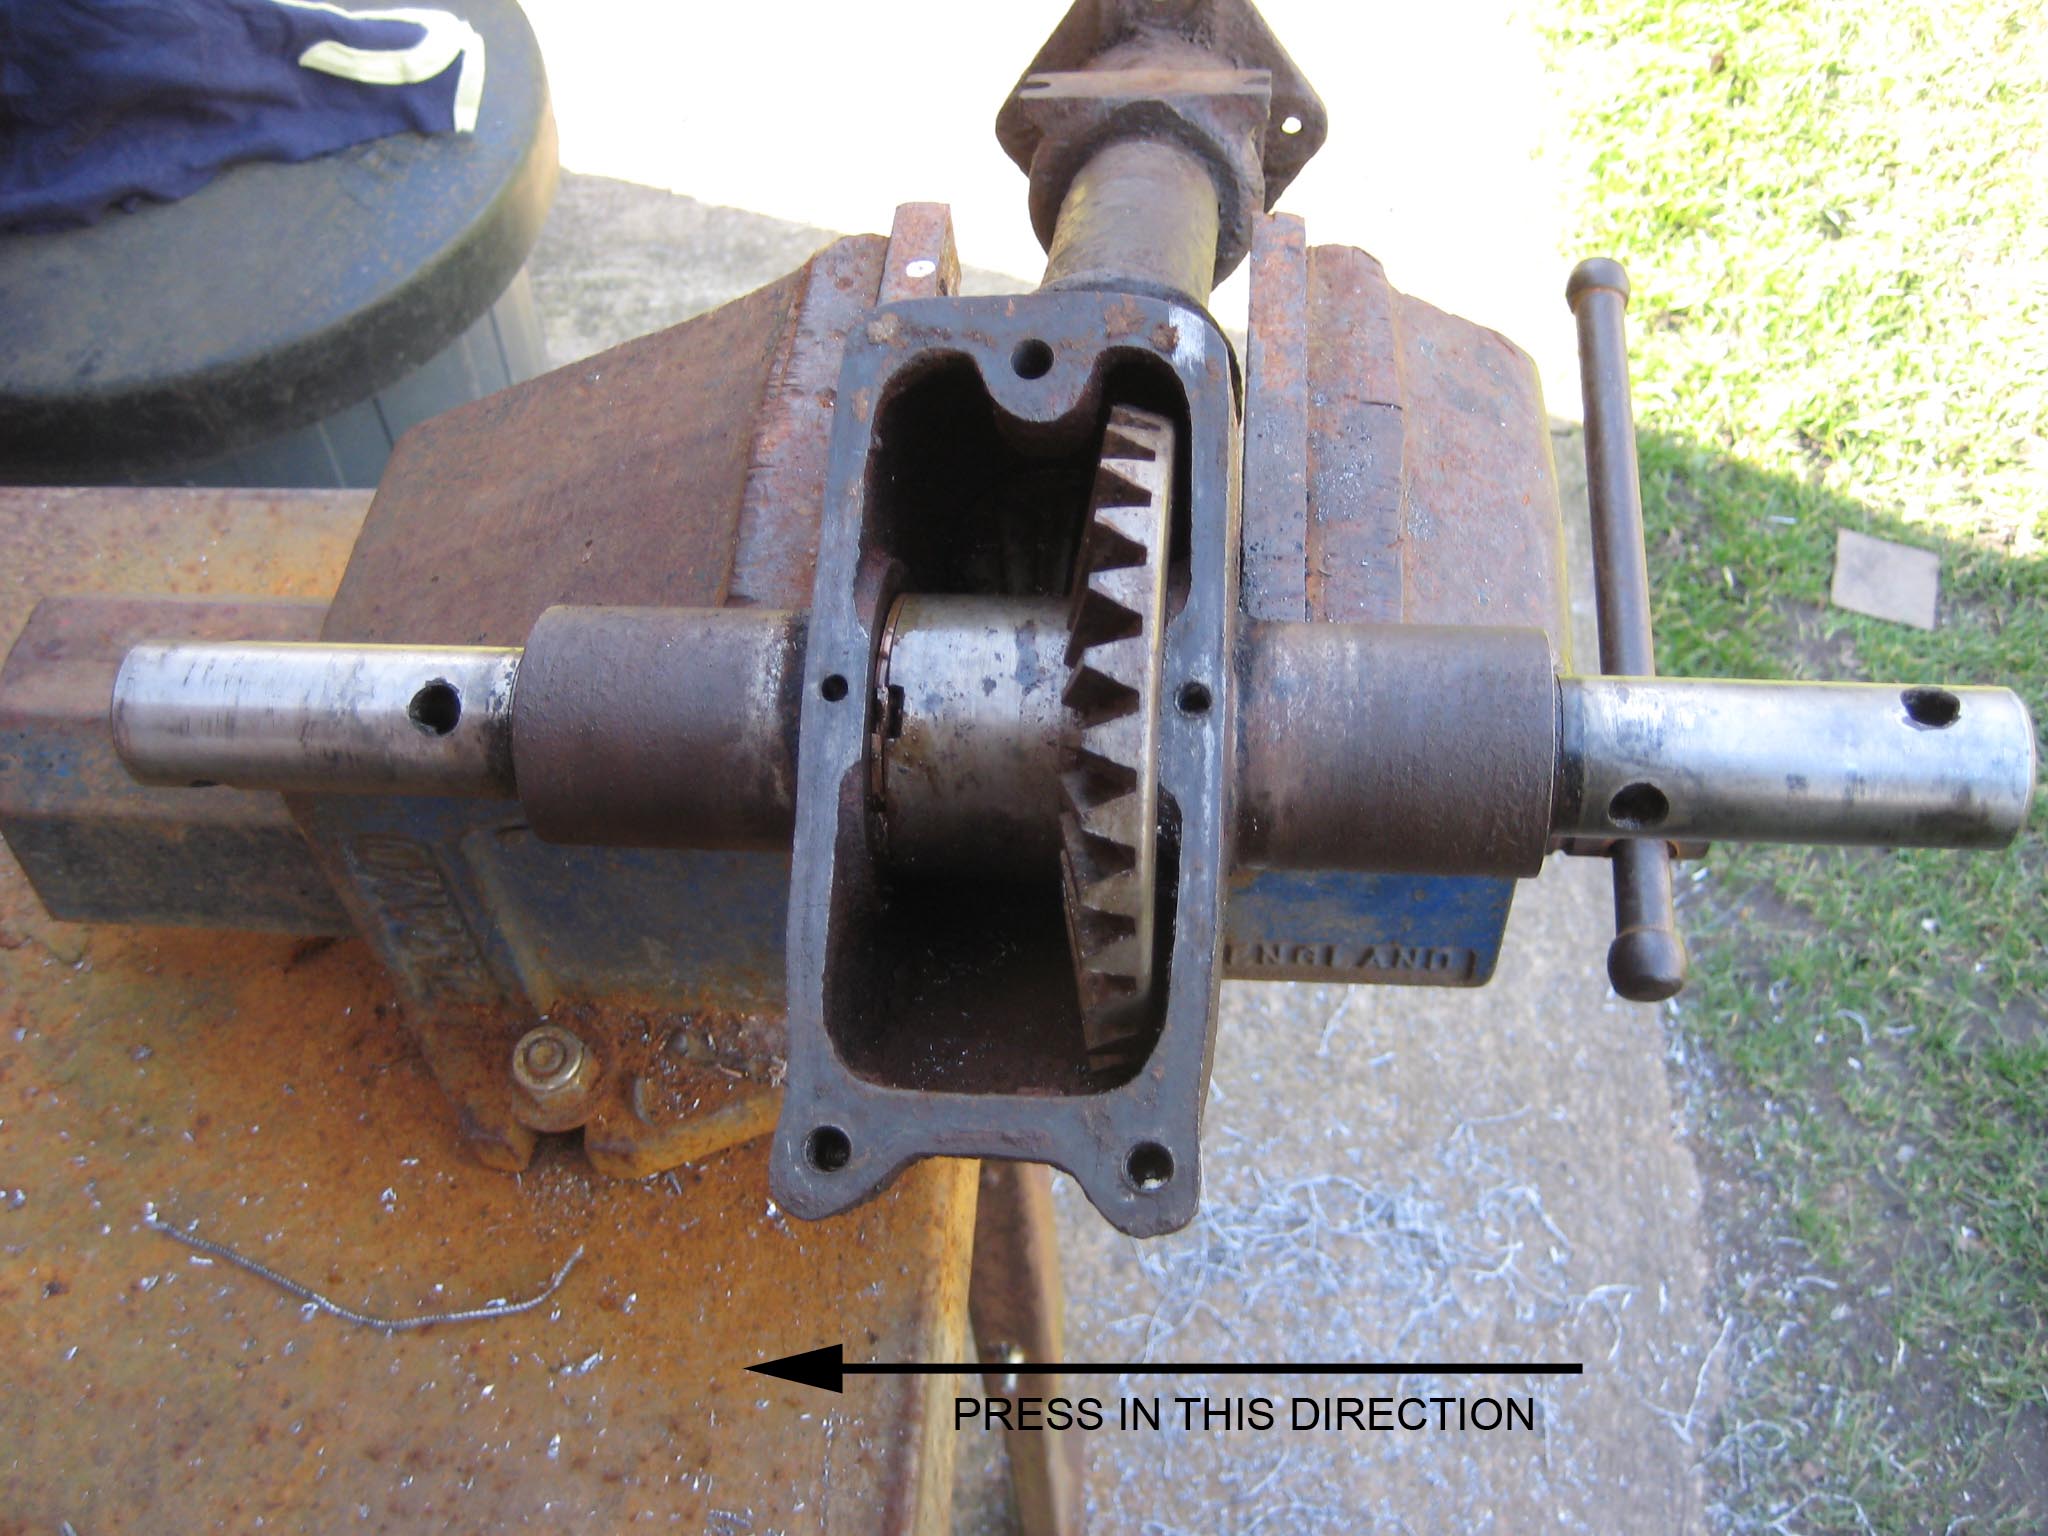
With the miller drive cover removed to expose the gears, there are two locating pins on the axis of the miller drive shaft (see picture 1). These secure the bronze bushes in place and must be removed. When the drive shaft is pressed out, the keys which locate the crown wheel cannot pass through the bushes, therefore the bush is pressed out along with the shaft.
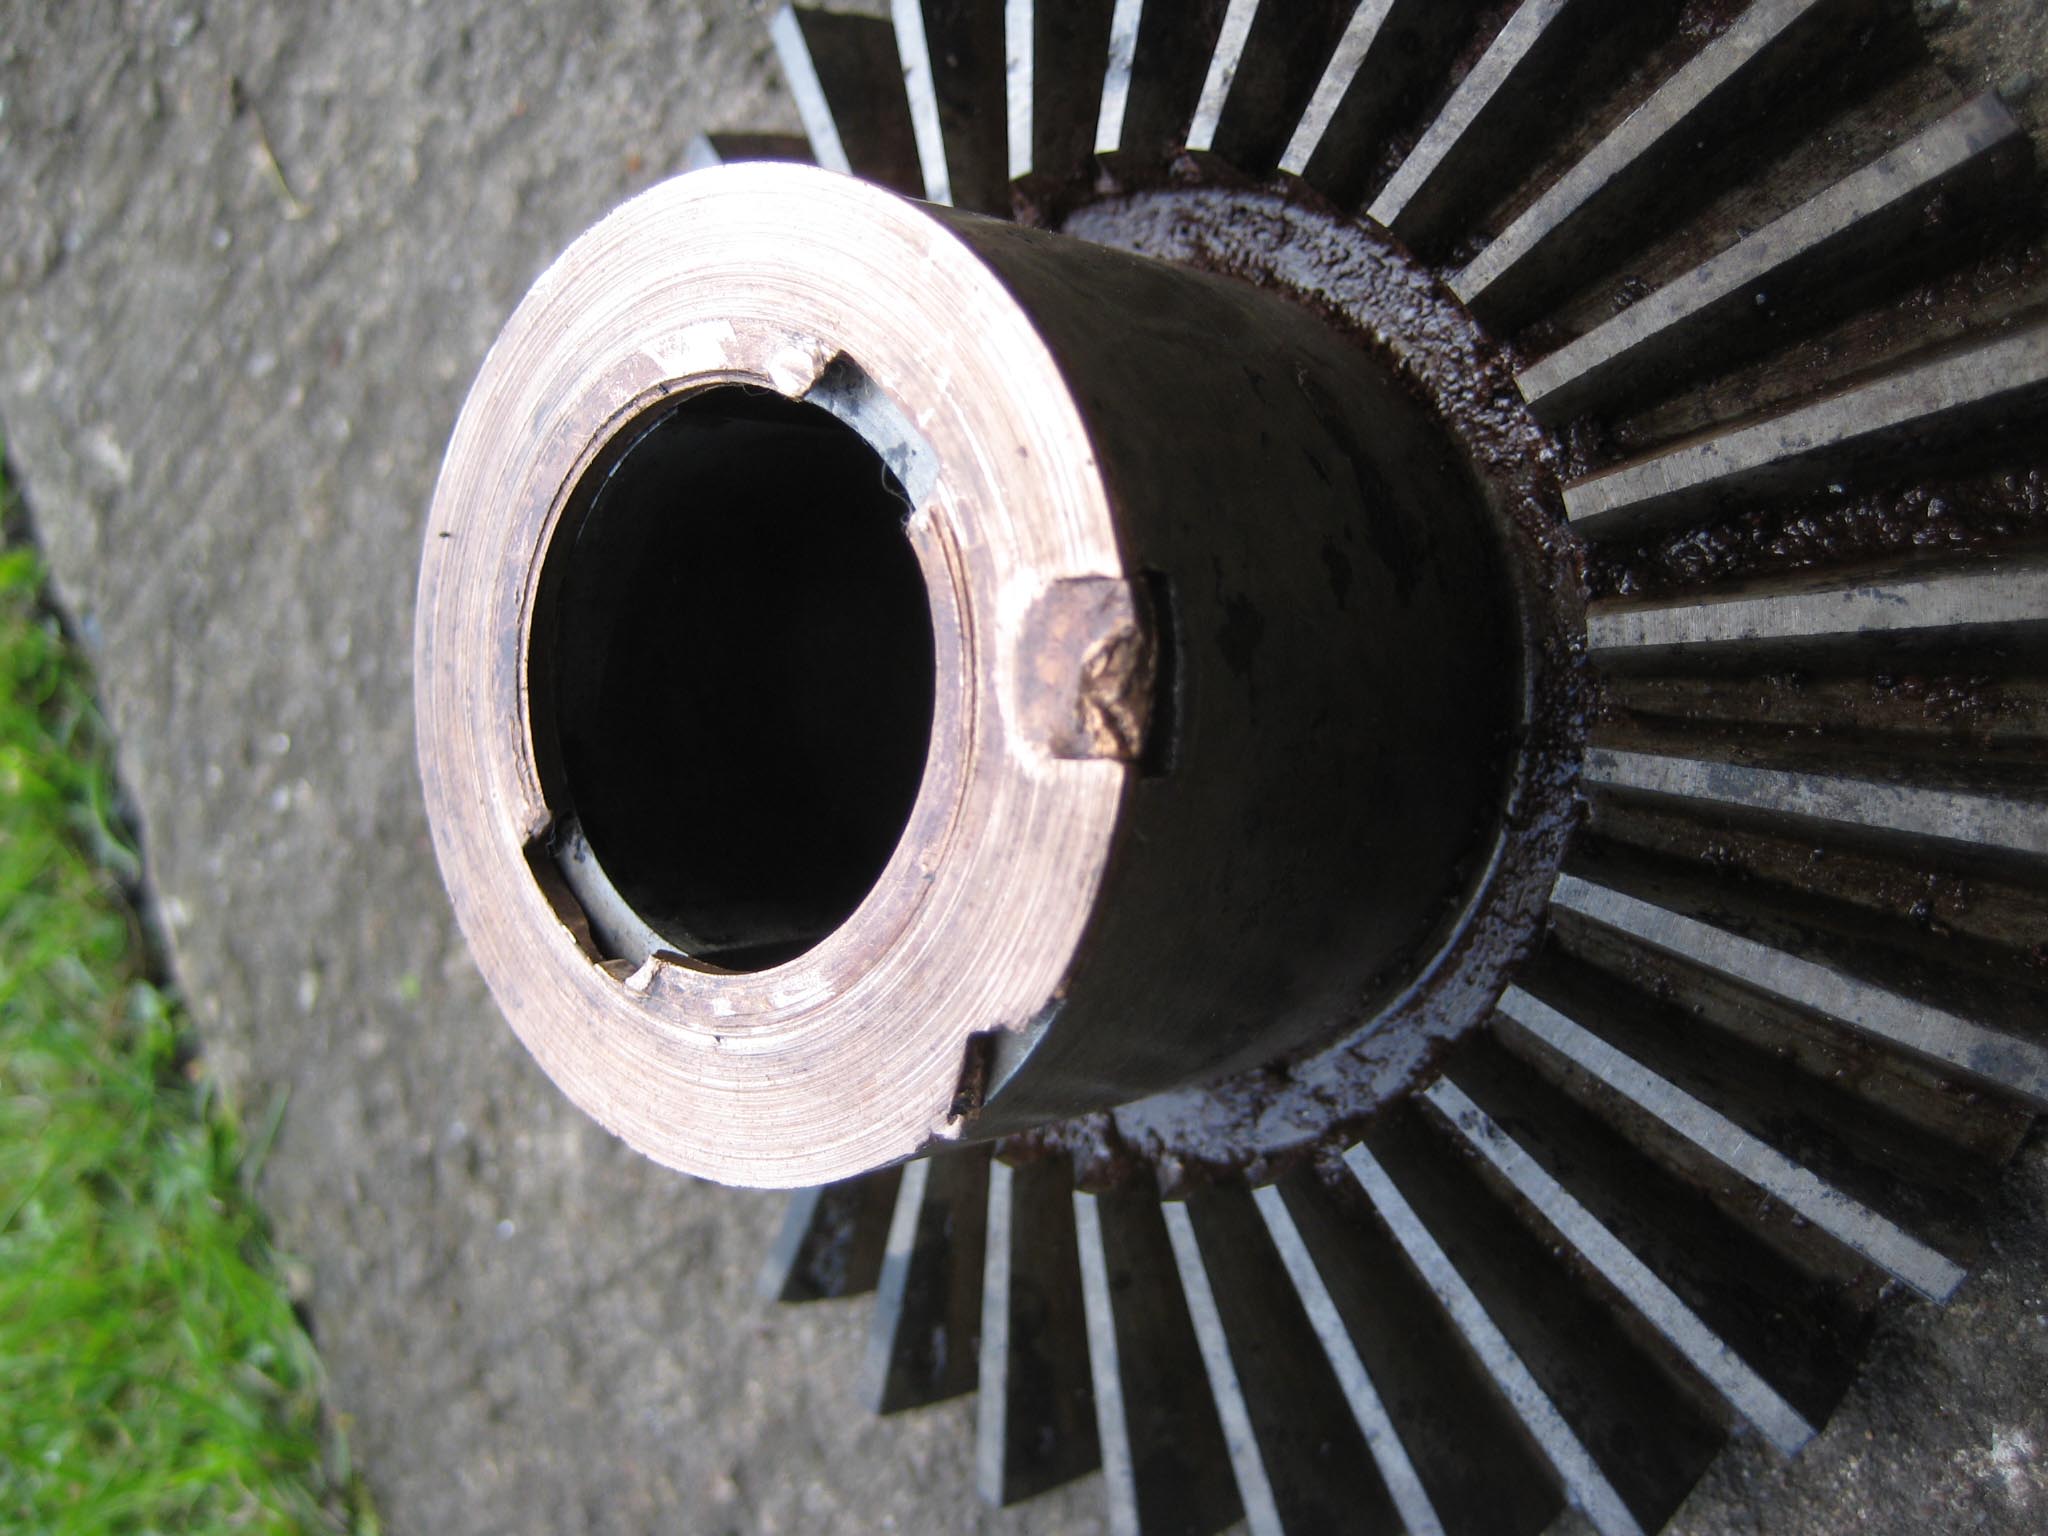
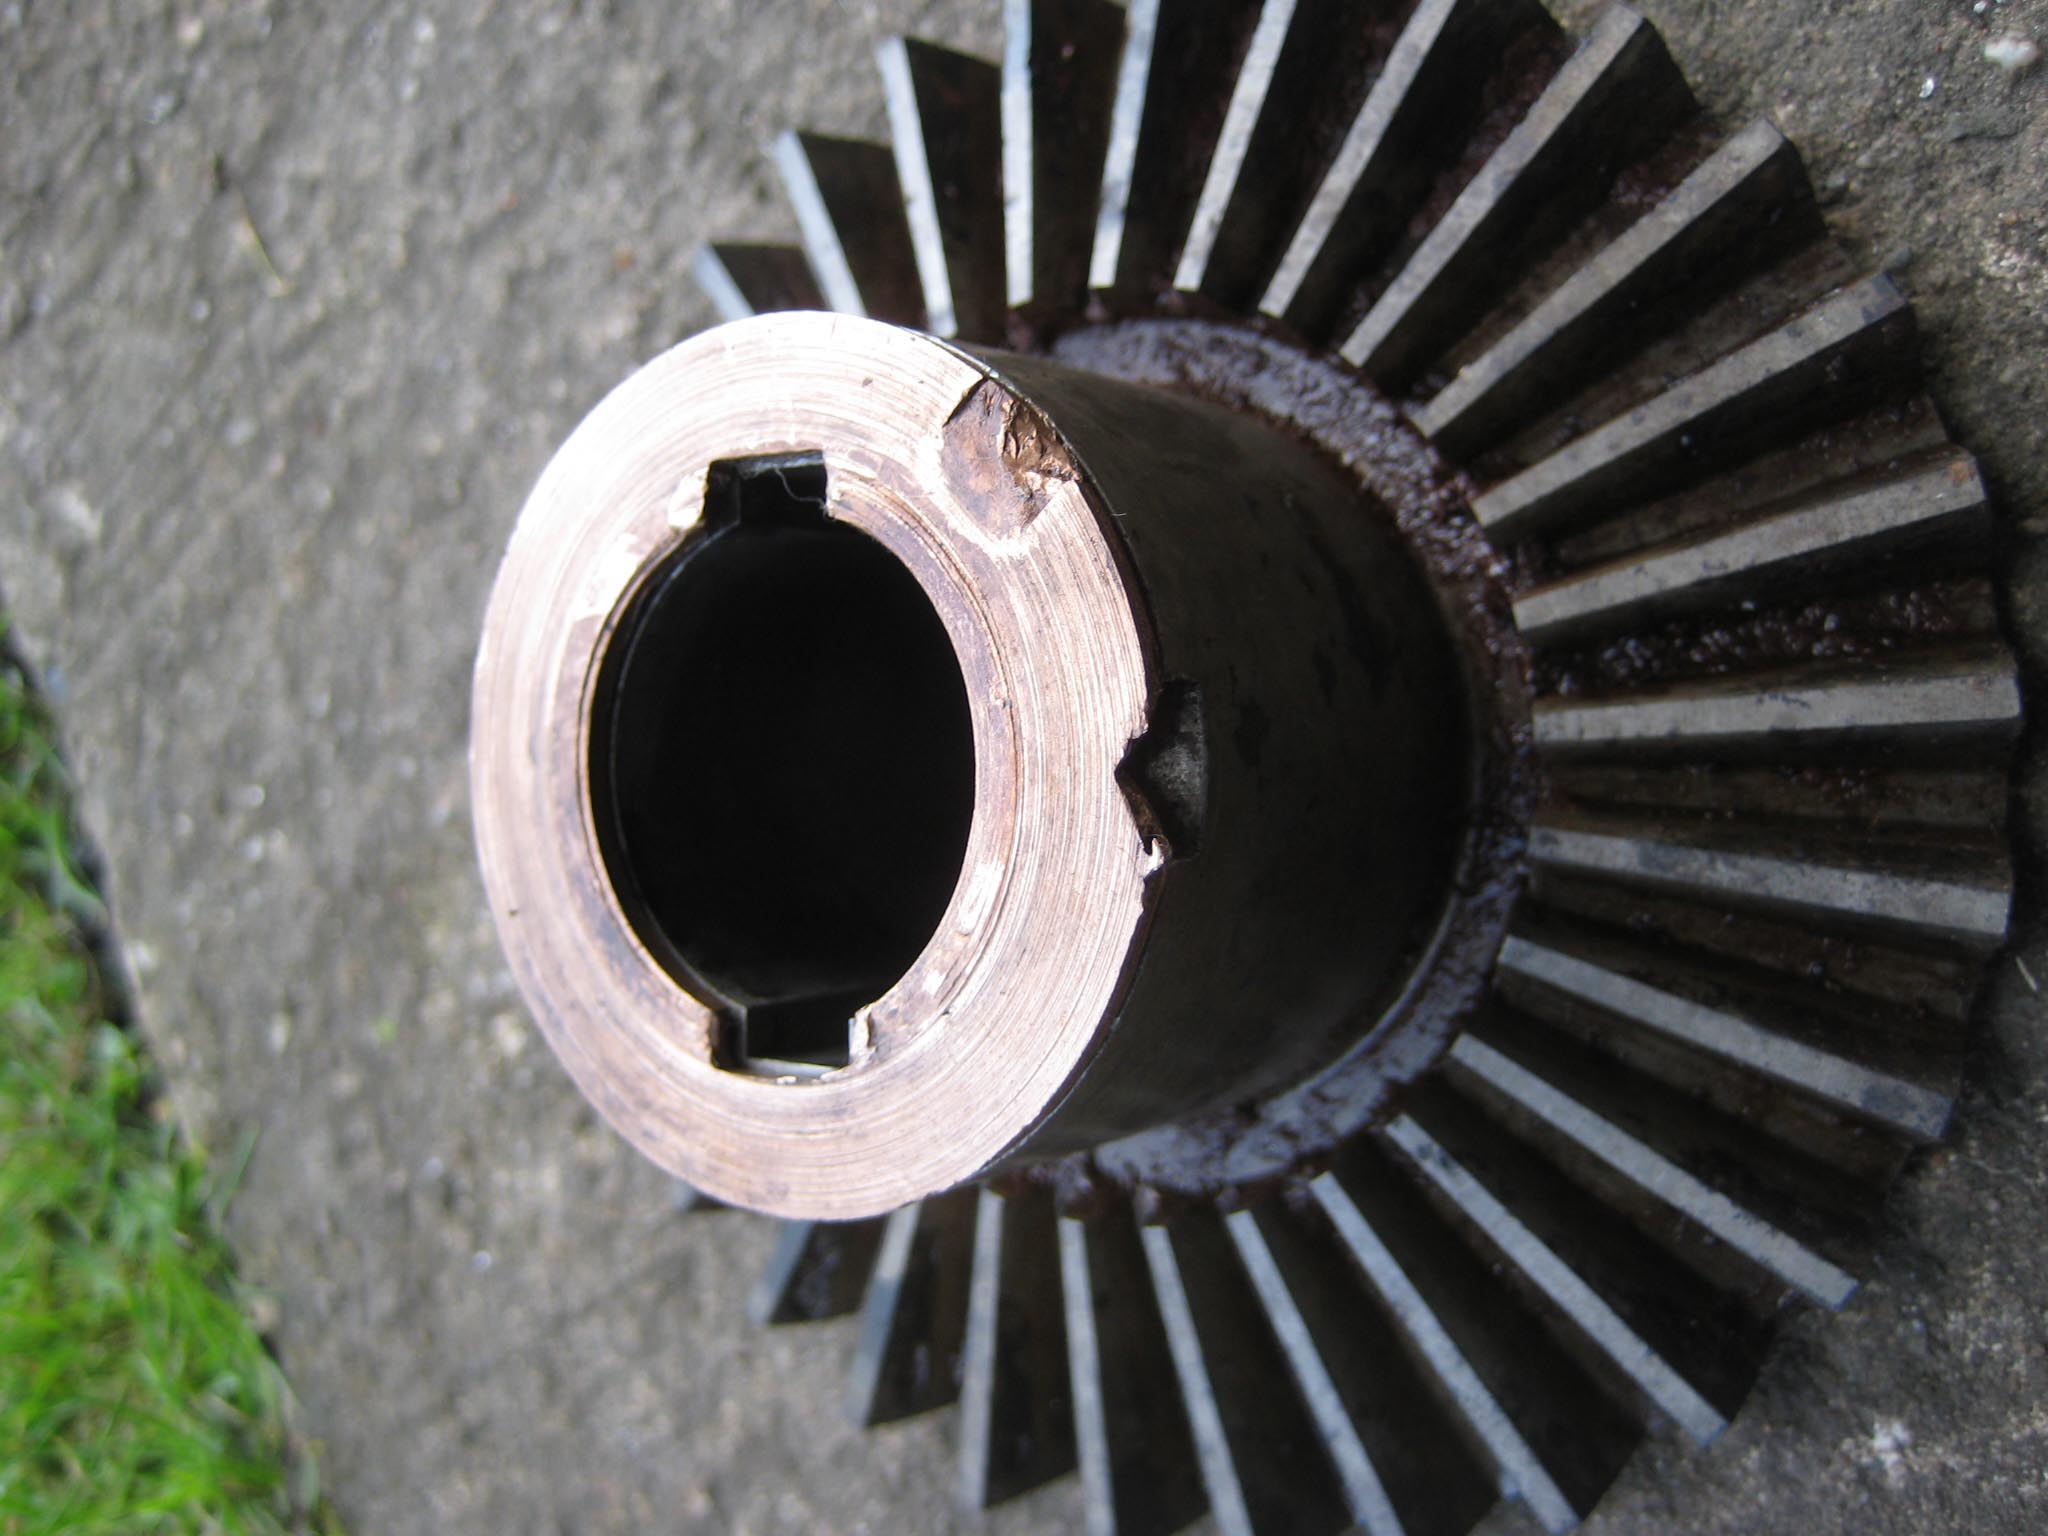
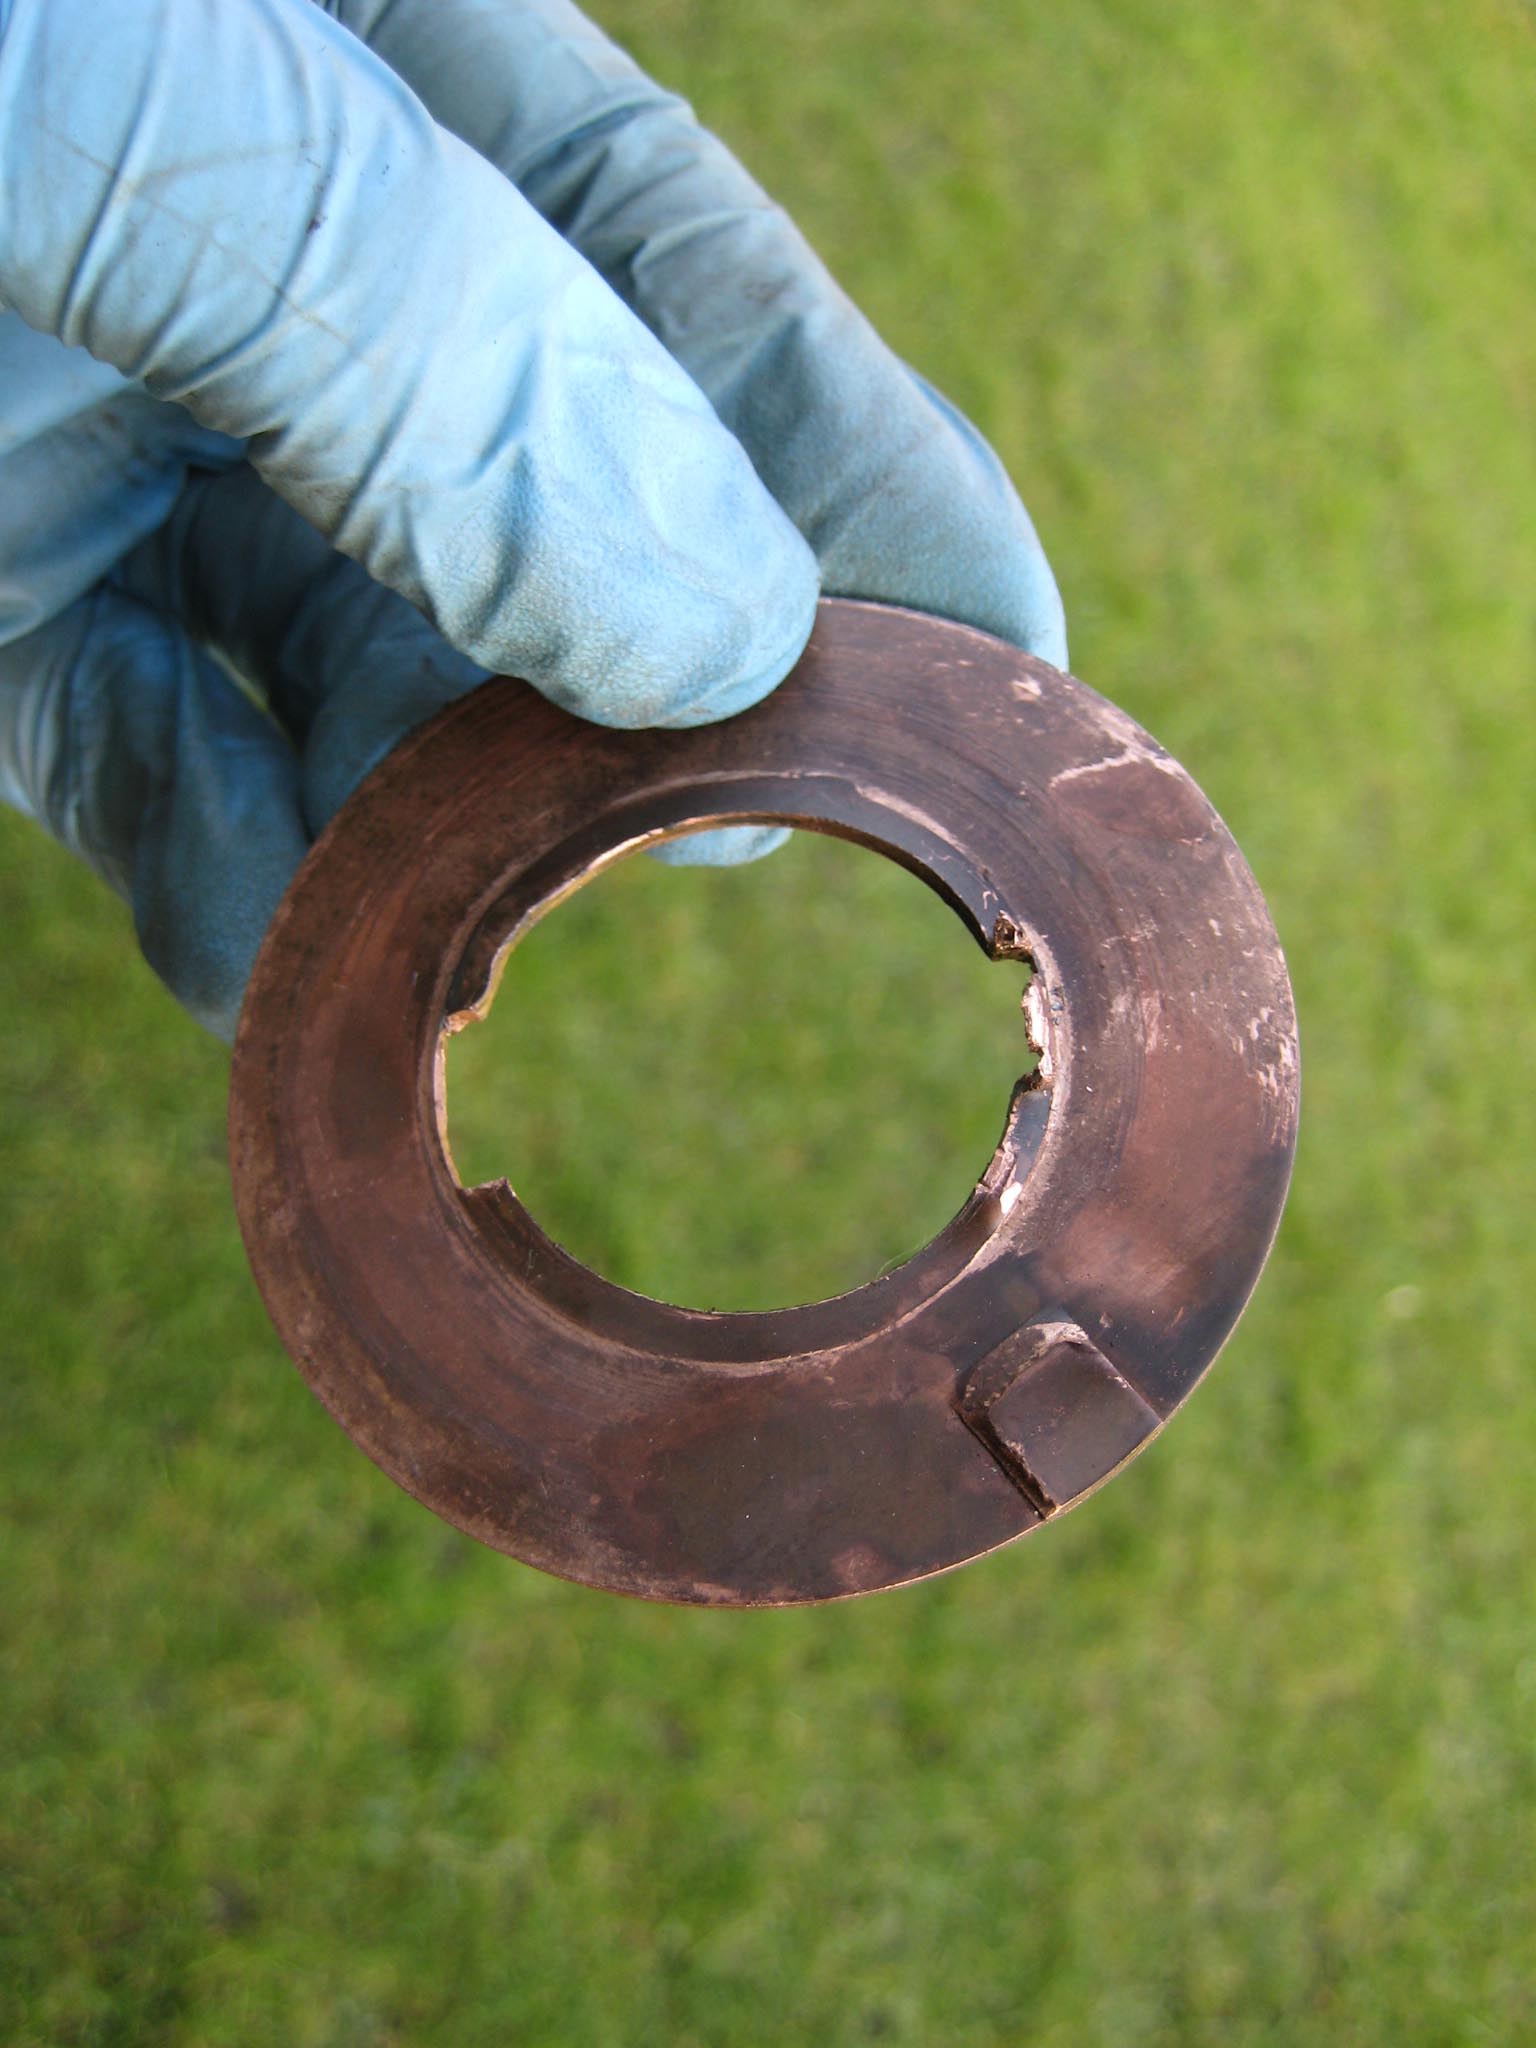
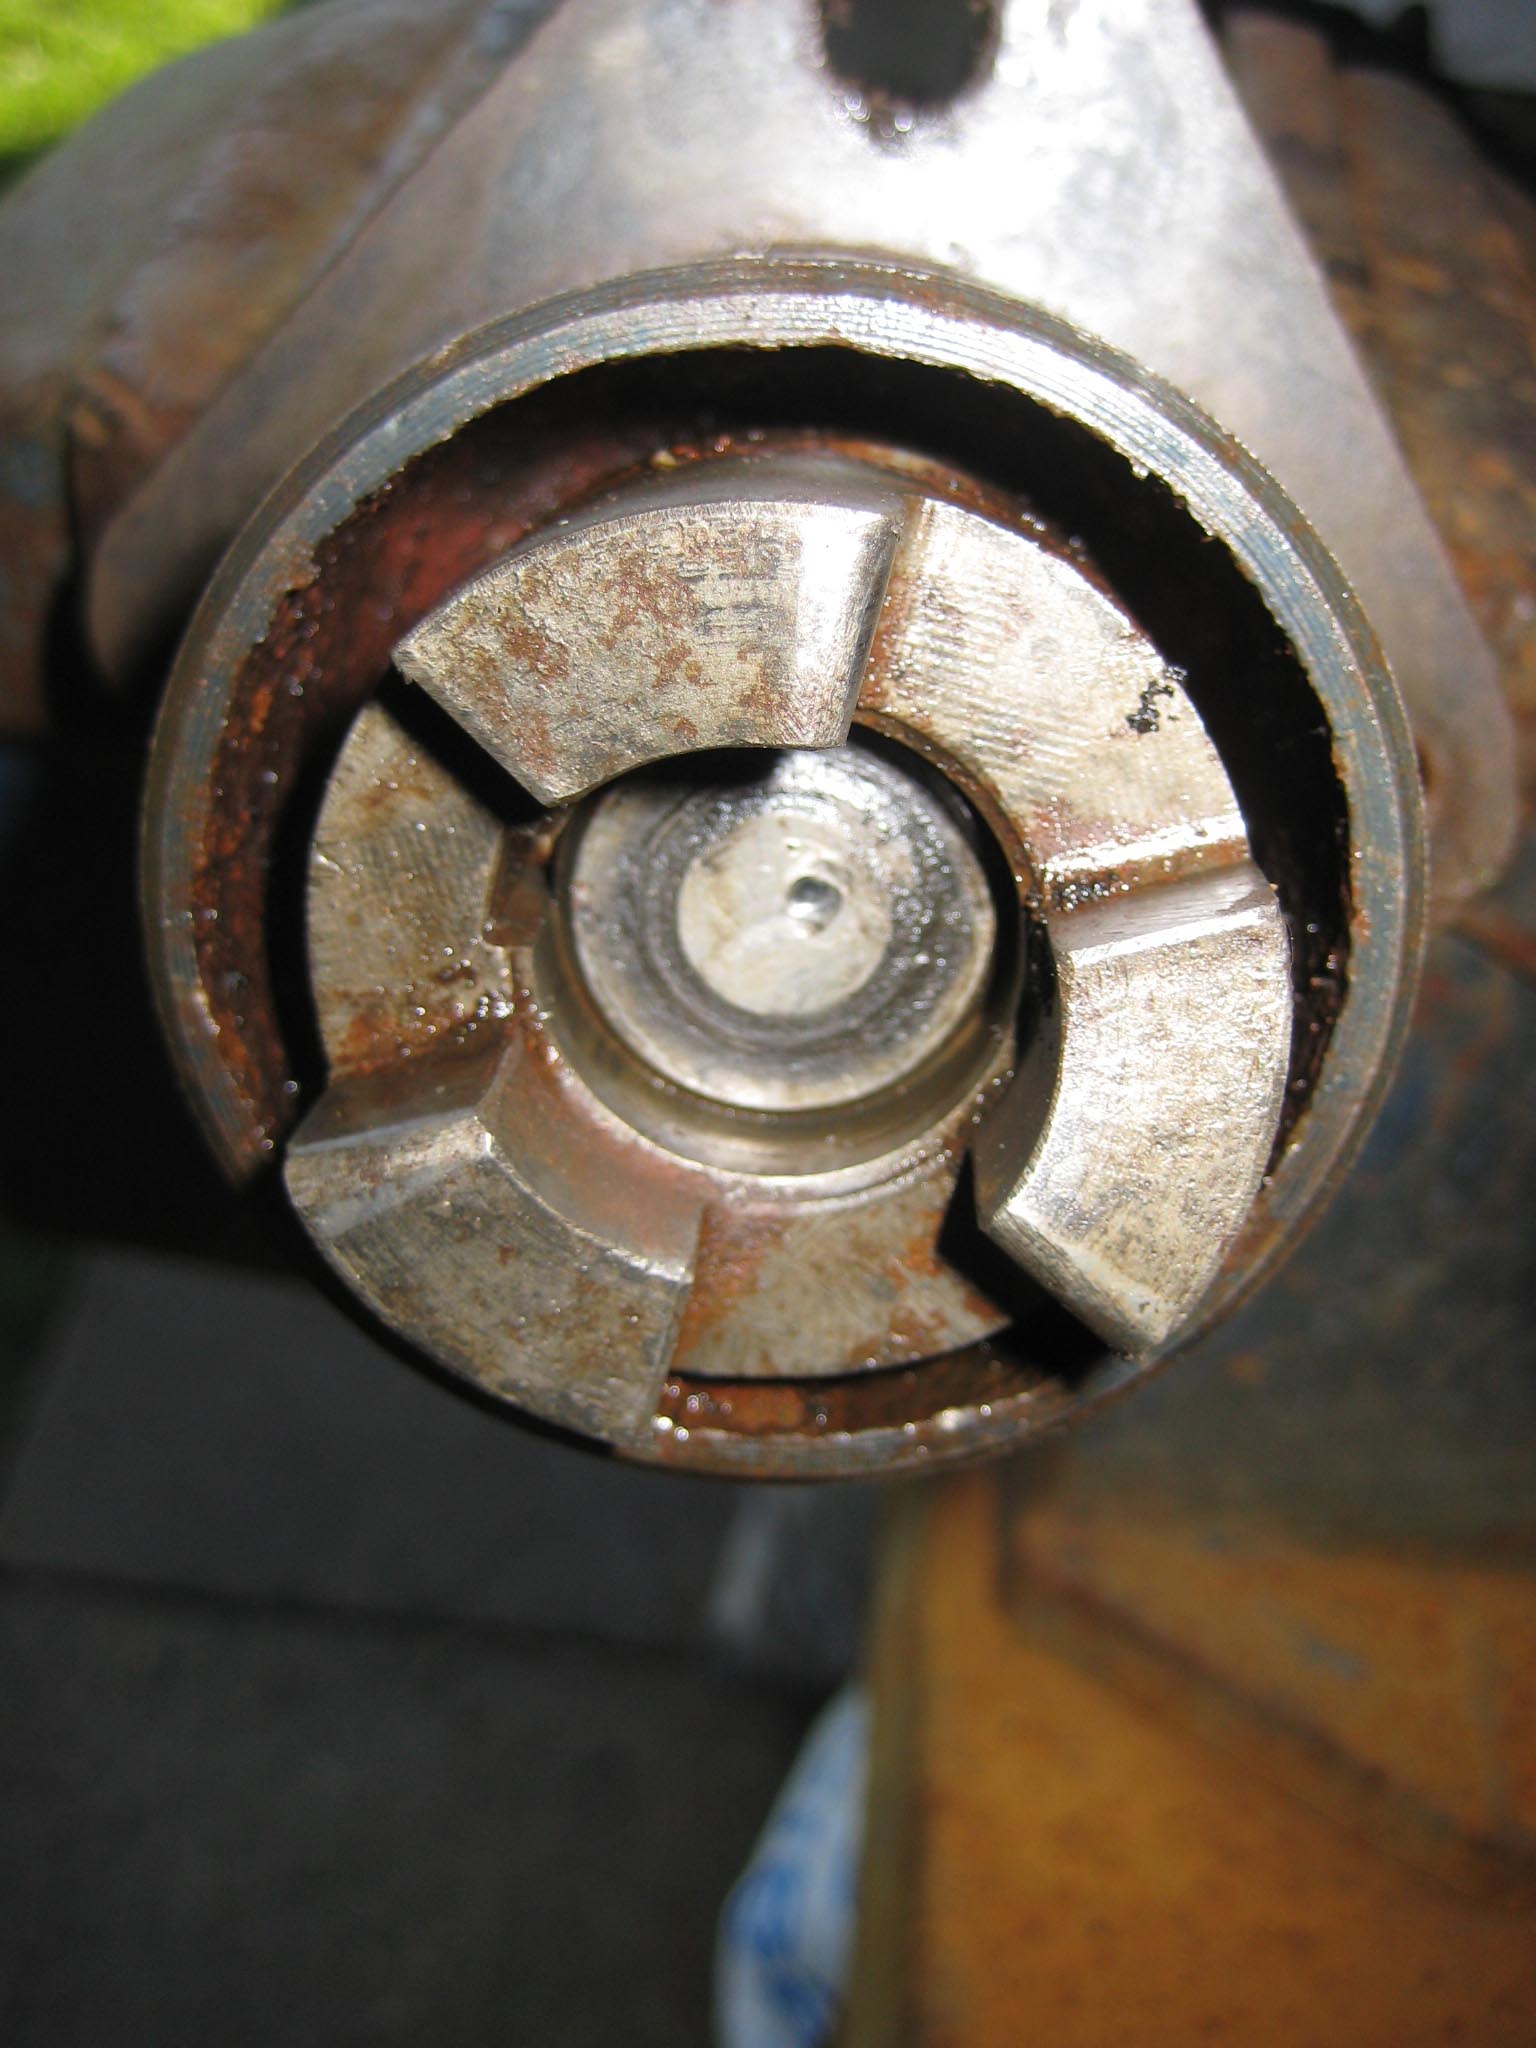
Next step is to align the bronze spacing washer at the left hand side of the crown wheel. This is done by rotating the crown wheel until you can see the locking tab on the washer which is bent over into a matching recess in the crown wheel. Bend the tab on the washer until it is flush, so the washer can now turn independently of the crown wheel. You should also see a ‘V’ shaped notch close to the locking tab. Insert a flat bladed screwdriver into this notch and gently tap the washer around until the notch lines up with the locking tab recess in the crown wheel. The washer has two rectangular notches cut out so the crown wheel keys can pass through. (see pictures 2 & 3). This means the miller drive shaft can only be pressed out in one direction (see picture 4). Unfortunately, all of the above did not become apparent until I had everything dismantled. Being blissfully unaware, sods law came into effect and I pressed the shaft out in the opposite direction, which damaged the bronze spacing washer which is on the right hand side of the crown wheel and does not contain the necessary key slots cut into it (see picture 5).
As previously mentioned, the left hand bush will be pressed out along with the drive shaft. If also removing the right hand side bush, do not get them mixed up as they are handed. They have a helical oil way machined on the inside which carries oil outwards along the shaft as it rotates.
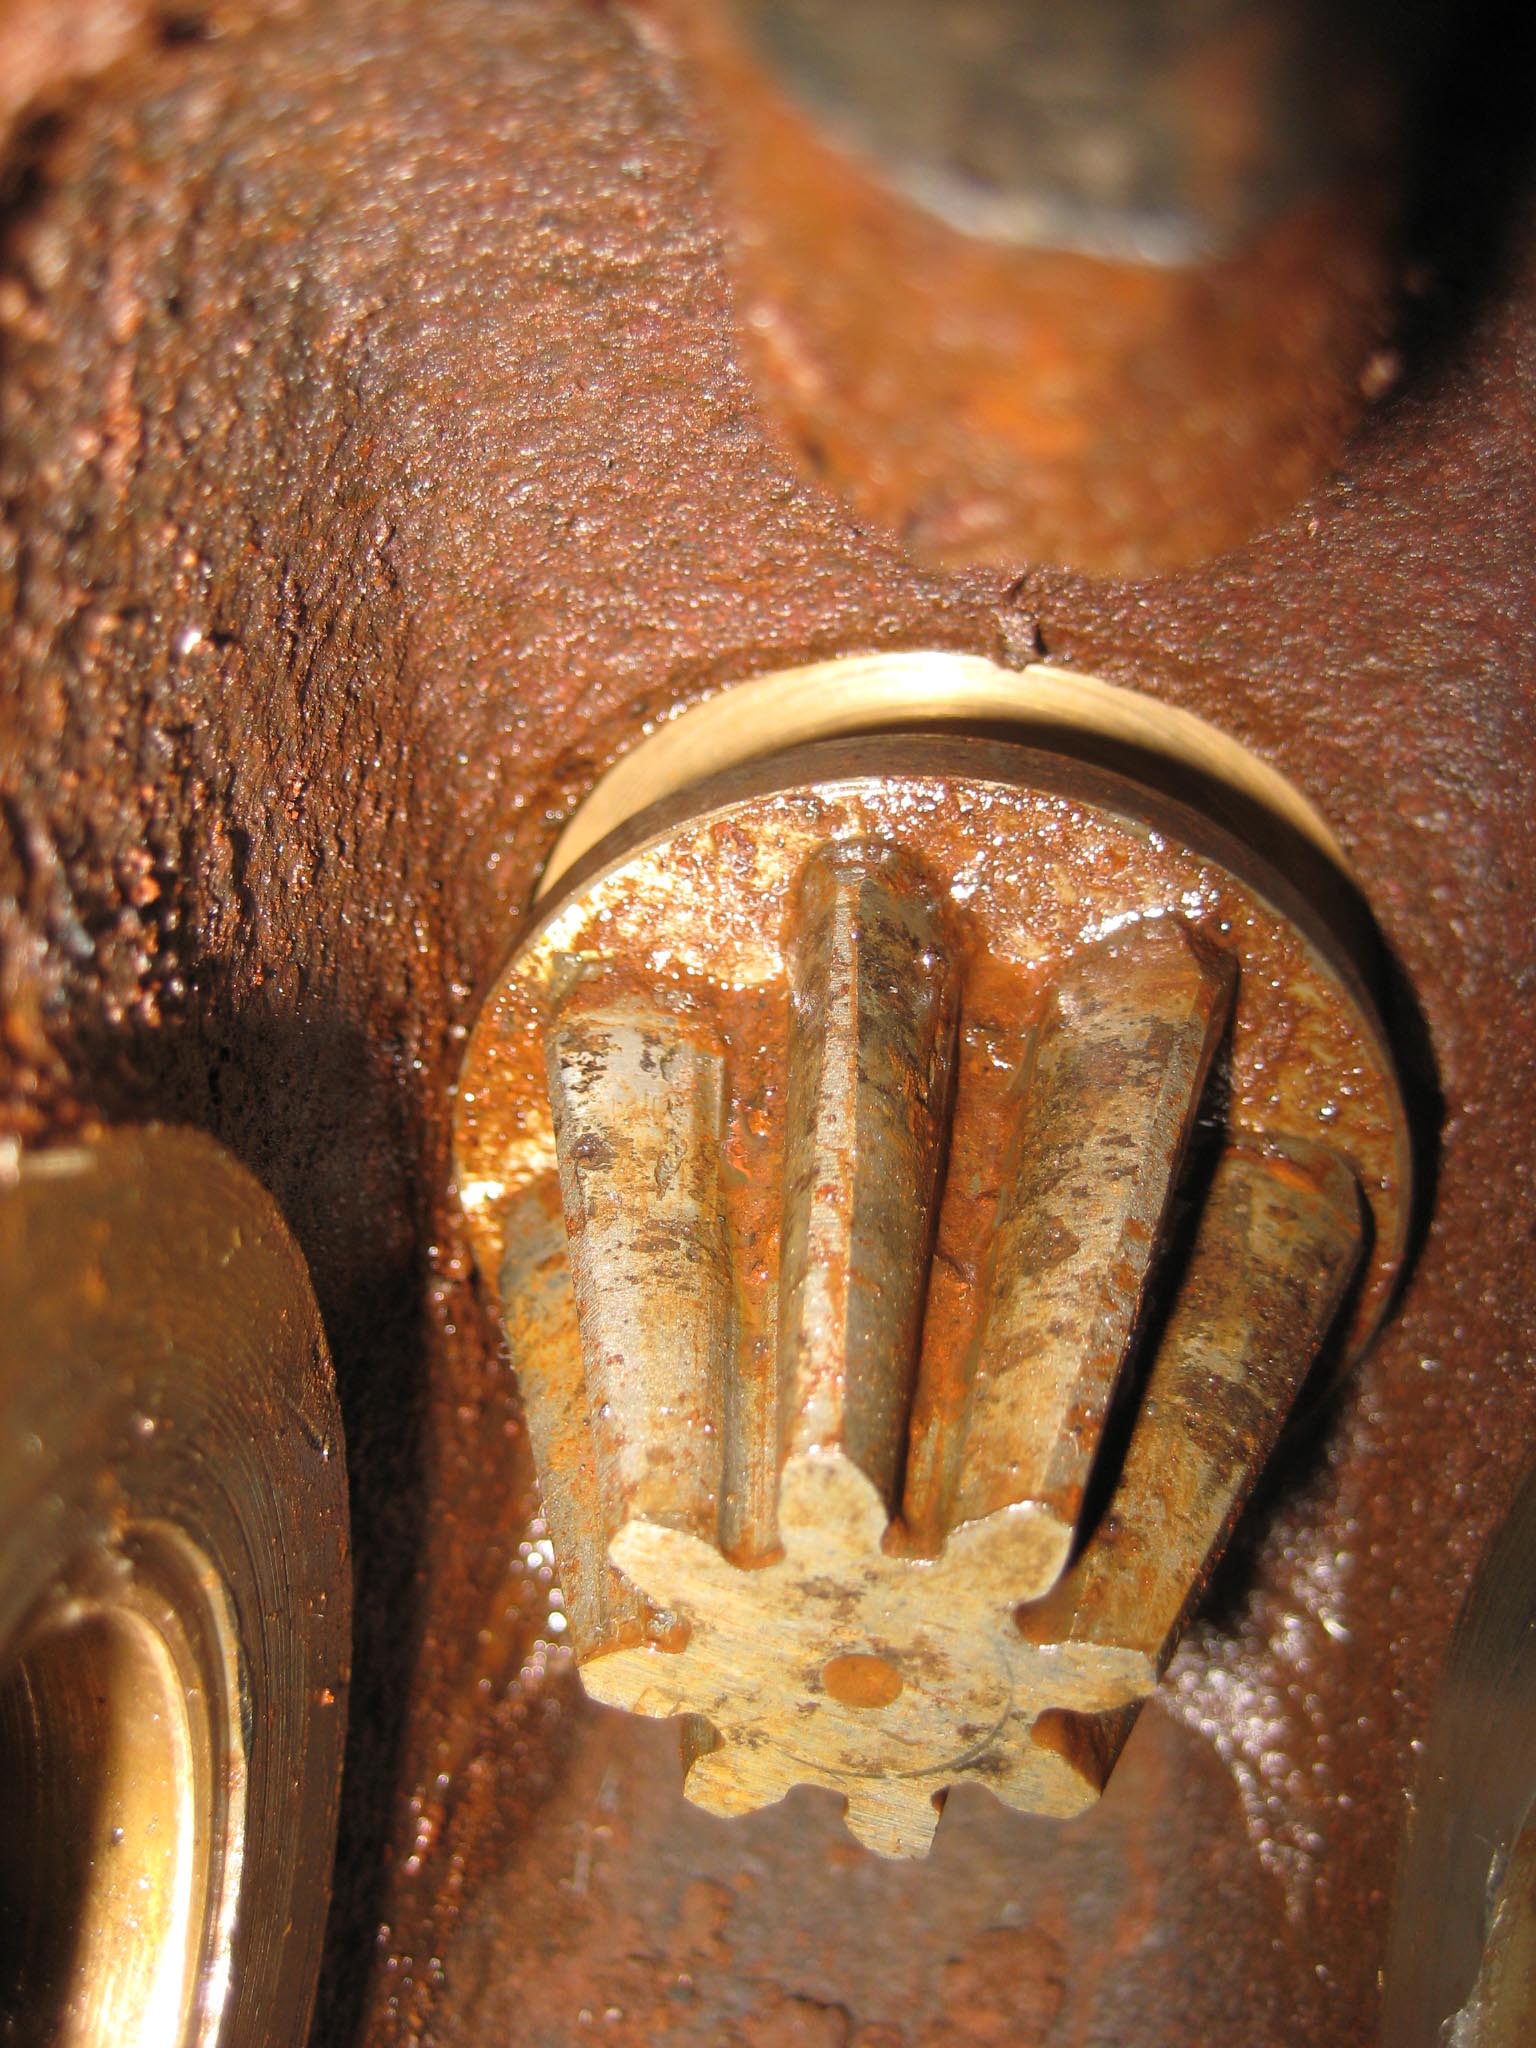
With the crown wheel and miller shaft removed, the pinion can be tackled next. Rotate the dog clutch until the roll pin lines up with the access holes and punch it out. The dog clutch needs to be pulled from the end of the pinion shaft. This is very awkward to do as the puller arms have to fit down the gap between the outside of the dog clutch and inside of the housing (see picture 6). An alternative method is drive the pinion shaft inwards a few millimetres, then from the pinion gear end (see picture 7) drive the shaft back the opposite way. What you are trying to achieve as enough room at the back of the dog clutch to insert a lever (in my case a stout screwdriver) through the roll pin access holes (see picture 8). It may take a few attempts of driving the shaft one way then the other to get the required gap, but it is important to do this in small increments as there is a bronze bush behind the dog clutch which will be damaged by forcing the dog clutch key into it. If you are not replacing the pinion shaft bush, make or buy a suitable puller. Lever the dog clutch from the shaft (penetrating oil and heat to expand the dog clutch may be required).
With the dog clutch out of the way, remove the dog clutch key and the pinion shaft can then be driven out from the dog clutch end.Attachments:
April 6, 2015 at 4:43 pm #12447vhgmcbuddyMemberThank you Dave, very helpful. Confirming I have not missed something is half the battle.
Cheers
GraemeApril 6, 2015 at 9:11 am #12445vhgmcbuddyMembermany thanks for the answers I am away from home for the next 4/5 weeks but on my return will strip it off the machine and have a good look. the part No. is 7259 and is still available but is not a returnable once purchased though it would be a spare.
April 6, 2015 at 8:01 am #12443vhgmcbuddyMemberThanks Steve. I spent some time last week getting it so that it started fairly easily and the tick over was ok. 2 days ago we ran up against a piece of wood and it is now a bugger at starting and. when started the tick over is poor. I suspect that the timing is now a little out and that I need to look at the governor. If I have to I will take the head off and do the valves etc but I would prefer to play with the plough for a bit first. You advice re the springs is well noted. Thanks for your interest.
Chris
April 5, 2015 at 7:30 pm #12430vhgmcbuddyMemberThe condenser is new new one from Neil, so think its a good one.
April 5, 2015 at 7:29 pm #12429vhgmcbuddyMemberHi the Mag on the other MG2 is in poor condition, parts missing, so I have ordered a replacement Mag. Will come back once I have new Mag fitted. With new Mag and new fuel I am hopeful she will run.
-
AuthorPosts